Port MCP server
The Port Model Context Protocol (MCP) Server acts as a bridge, enabling Large Language Models (LLMs)—like those powering Claude, Cursor, or GitHub Copilot—to interact directly with your Port.io developer portal. This allows you to leverage natural language to query your software catalog, analyze service health, manage resources, and even streamline development workflows, all from your preferred interfaces.
The Port MCP Server is currently in open beta and provides significant standalone value, independent of our AI Agents feature. Port AI Agents are currently in closed beta with limited access, while the MCP Server gives you immediate access to streamline building in Port, query your catalog, analyze service health, and streamline development workflows using natural language.
While the MCP Server can interact with Port AI Agents when available, the core MCP functionality can be used freely without requiring access to the closed beta AI Agents feature.
Why integrate LLMs with your developer portal?
The primary advantage of the Port MCP Server is the ability to bring your developer portal's data and actions into the conversational interfaces you already use. This offers several benefits:
- Reduced Context Switching: Access Port information and initiate actions without leaving your IDE or chat tool.
- Increased Efficiency: Get answers and perform tasks faster using natural language commands.
- Improved Developer Experience: Make your developer portal more accessible and intuitive to interact with.
- Enhanced Data-Driven Decisions: Easily pull specific data points from Port to inform your work in real-time.
As one user put it:
"It would be interesting to build a use case where a developer could ask Copilot from his IDE about stuff Port knows about, without actually having to go to Port."
The Port MCP Server directly enables these kinds of valuable, in-context interactions.
Key capabilities and use-cases
The Port MCP Server enables you to interact with your Port data and capabilities directly through natural language within your chosen LLM-powered tools. Here's what you can achieve:
Find information quickly
Effortlessly query your software catalog and get immediate answers. This eliminates the need to navigate through UIs or write complex API queries when you need information.
- Ask: "Who is the owner of service X?"
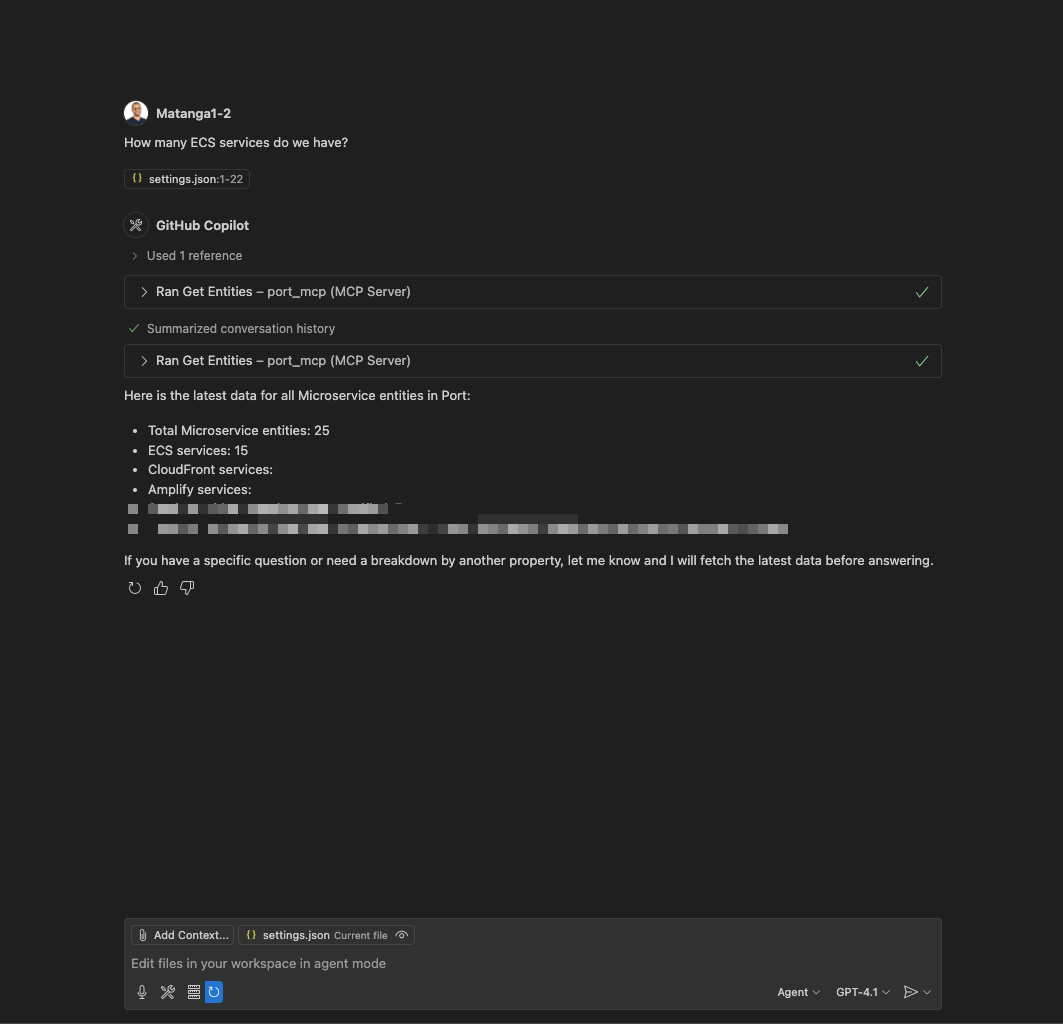
- Ask: "How many services do we have in production?"
- Ask: "Show me all the microservices owned by the Backend team."
- Ask: "What are the dependencies of the 'OrderProcessing' service?"
Vibe-build in Port
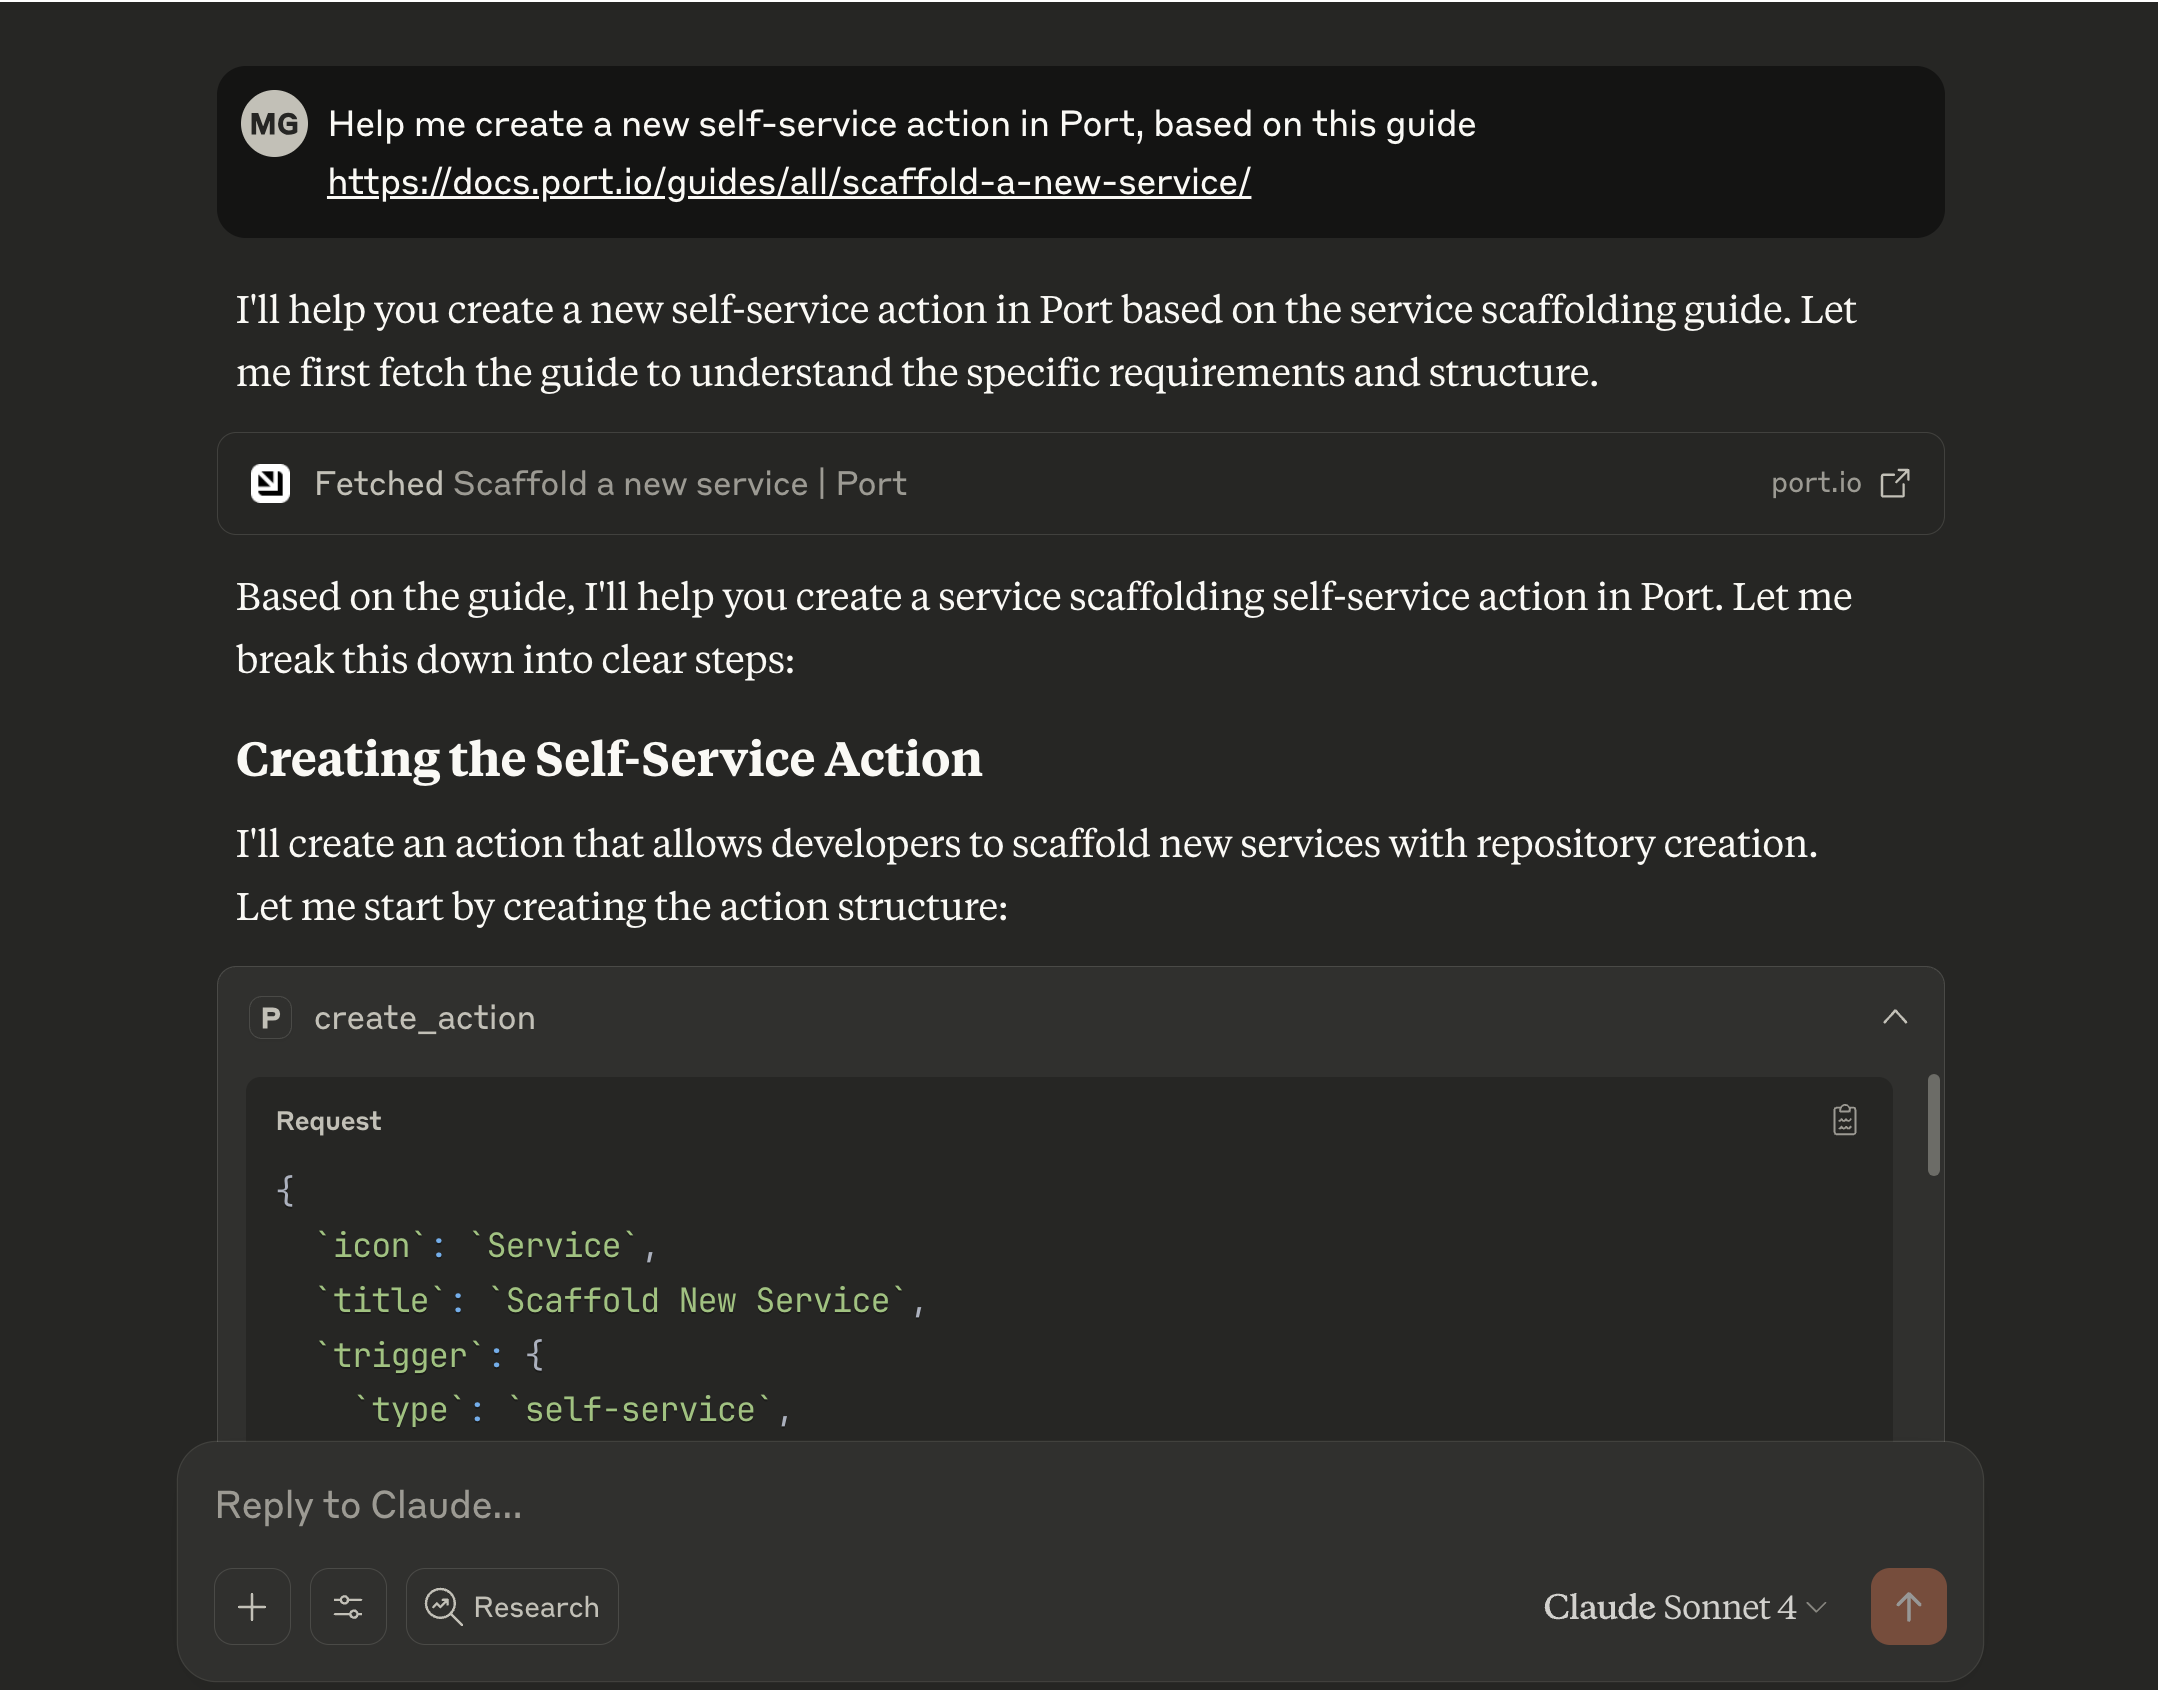
Leverage Claude's capabilities to manage and build your entire Port software catalog. You can create and configure blueprints, set up self-service actions, design scorecards, and more.
- Ask: "Please help me apply this guide into my Port instance - [[guide URL]]"
- Ask: "I want to start managing my k8s deployments, how can we build it in Port?"
- Ask: "I want a new production readiness scorecard to track the code quality and service alerts"
- Ask: "Create a new self-service action in Port to scaffold a new service"
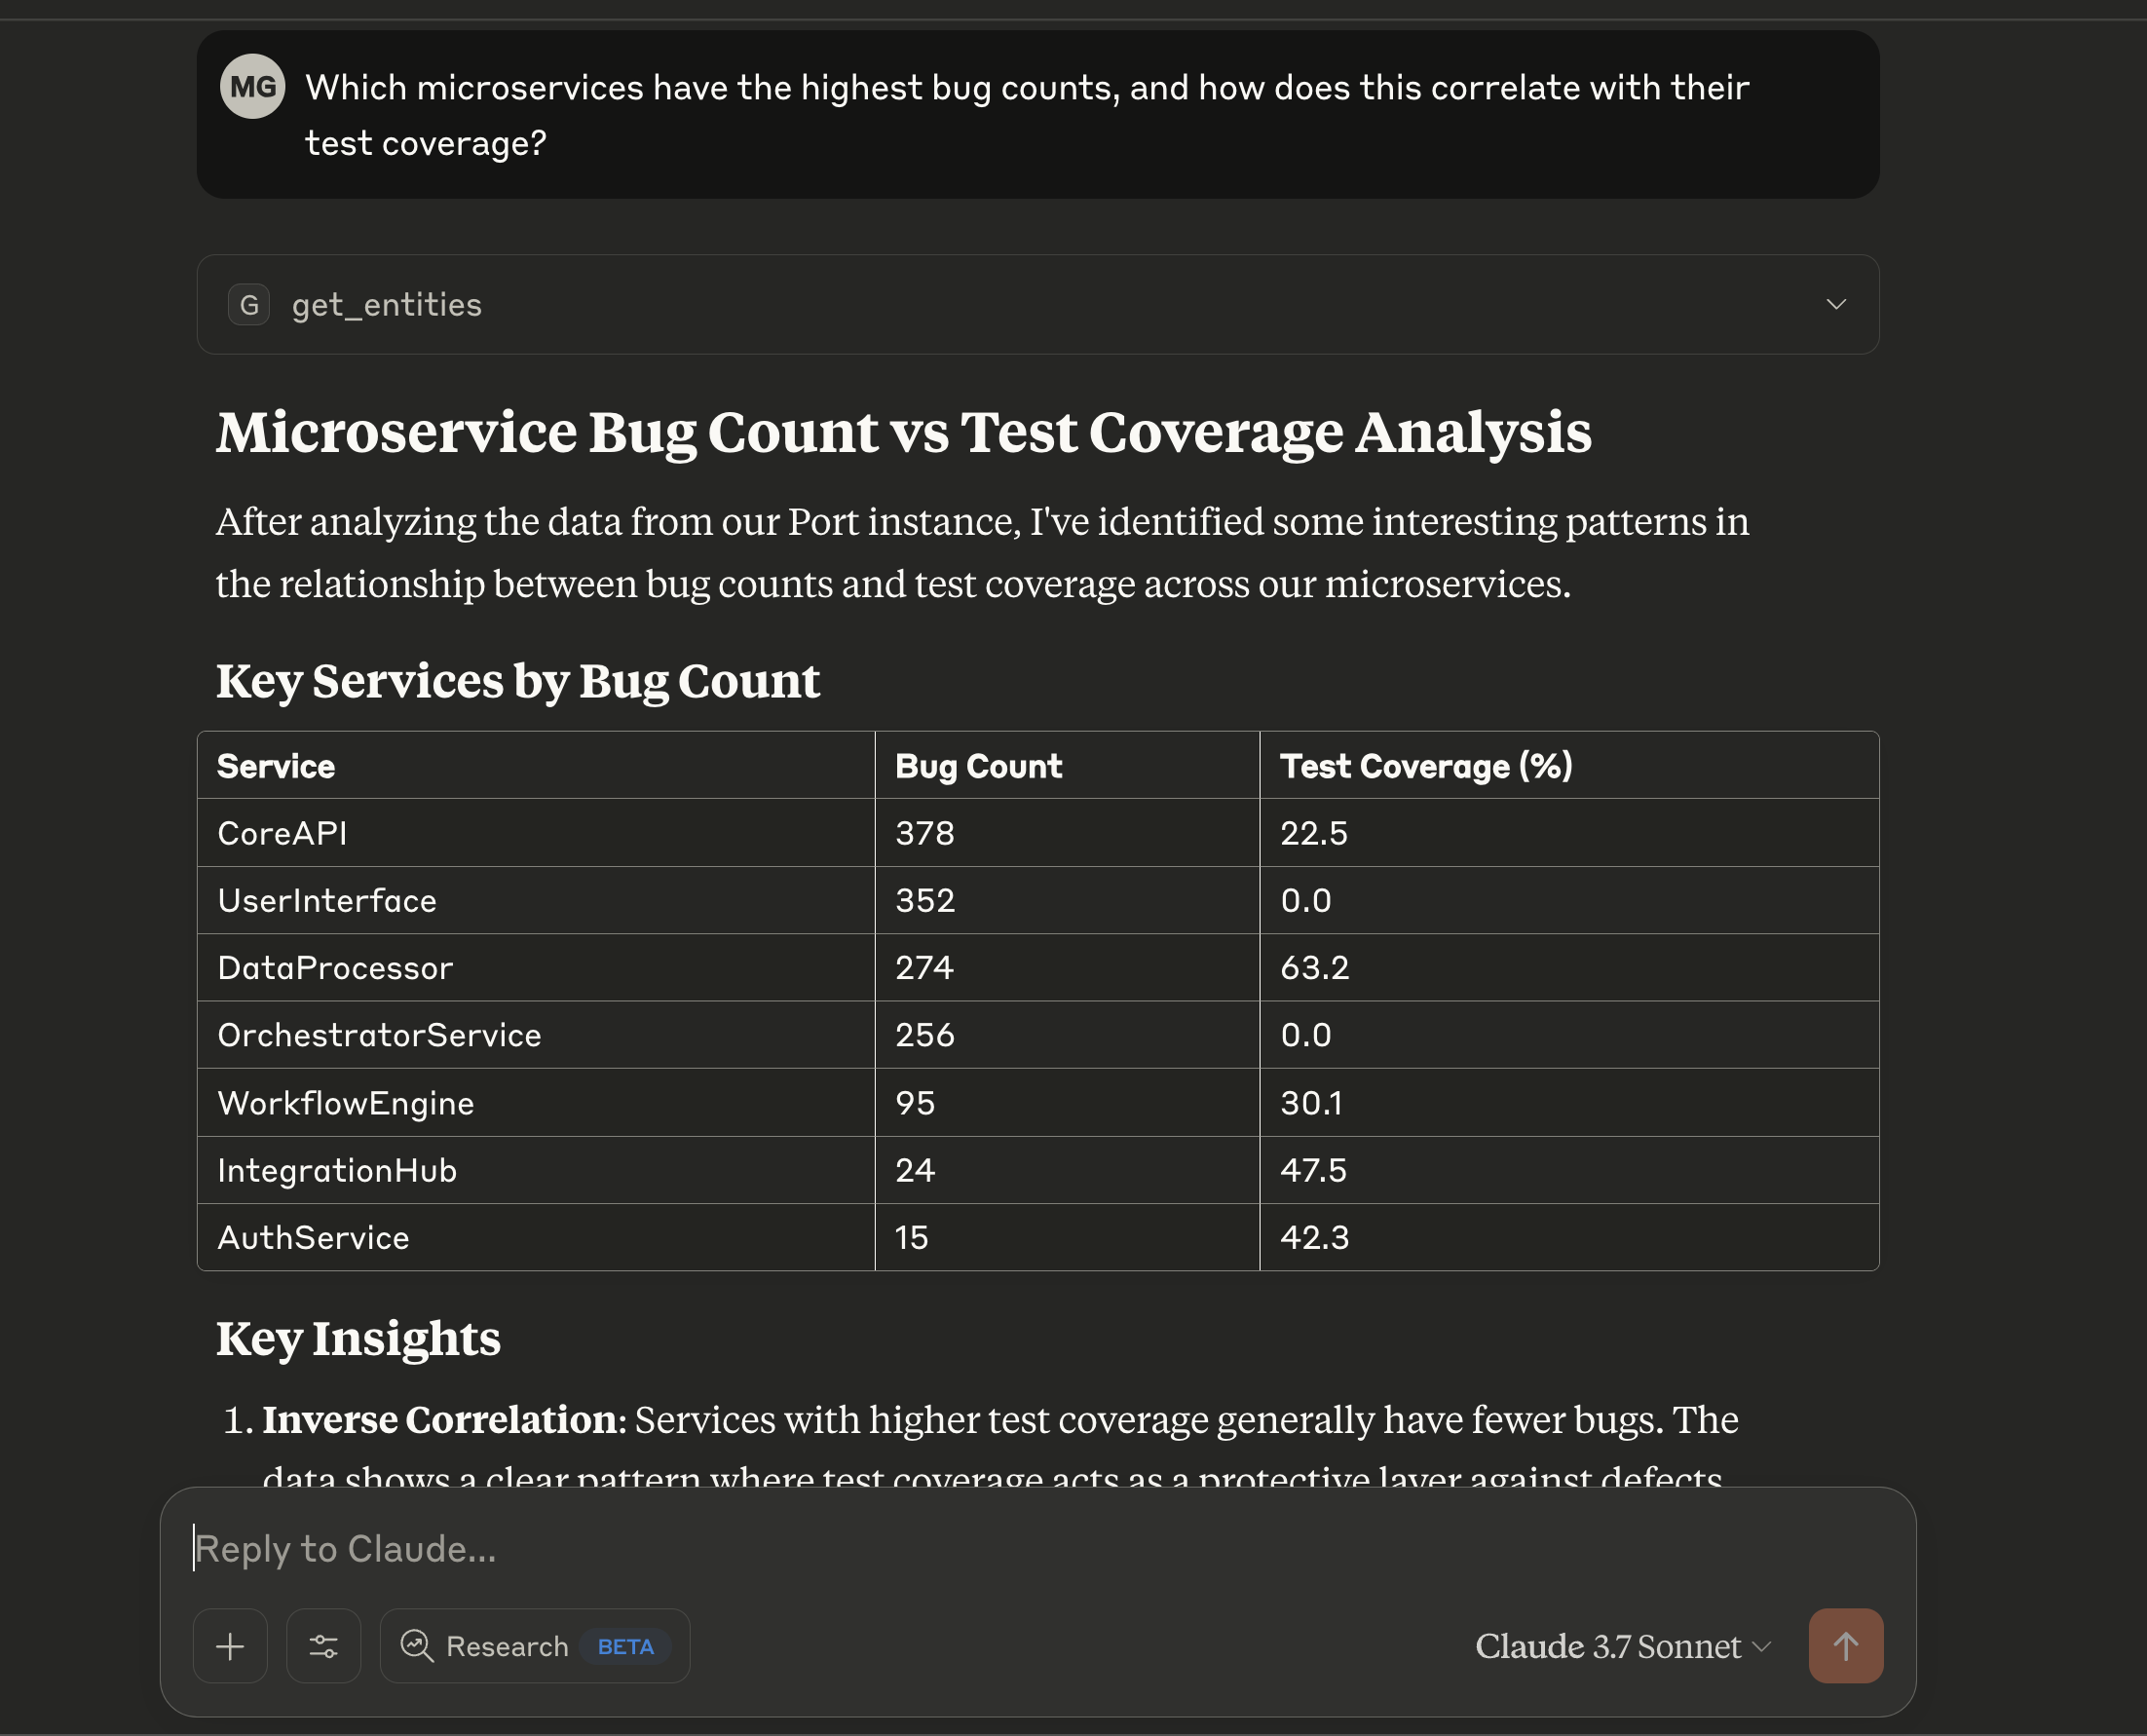
Analyze scorecards and quality
Gain insights into service health, compliance, and quality by leveraging Port's scorecard data. Identify areas for improvement and track progress against your standards.
- Ask: "Which services are failing our security requirements scorecard?"
- Ask: "What's preventing the 'InventoryService' from reaching Gold level in the 'Production Readiness' scorecard?"
- Ask: "Show me the bug count vs. test coverage for all Java microservices."
- Ask: "Which of our services are missing critical monitoring dashboards?"

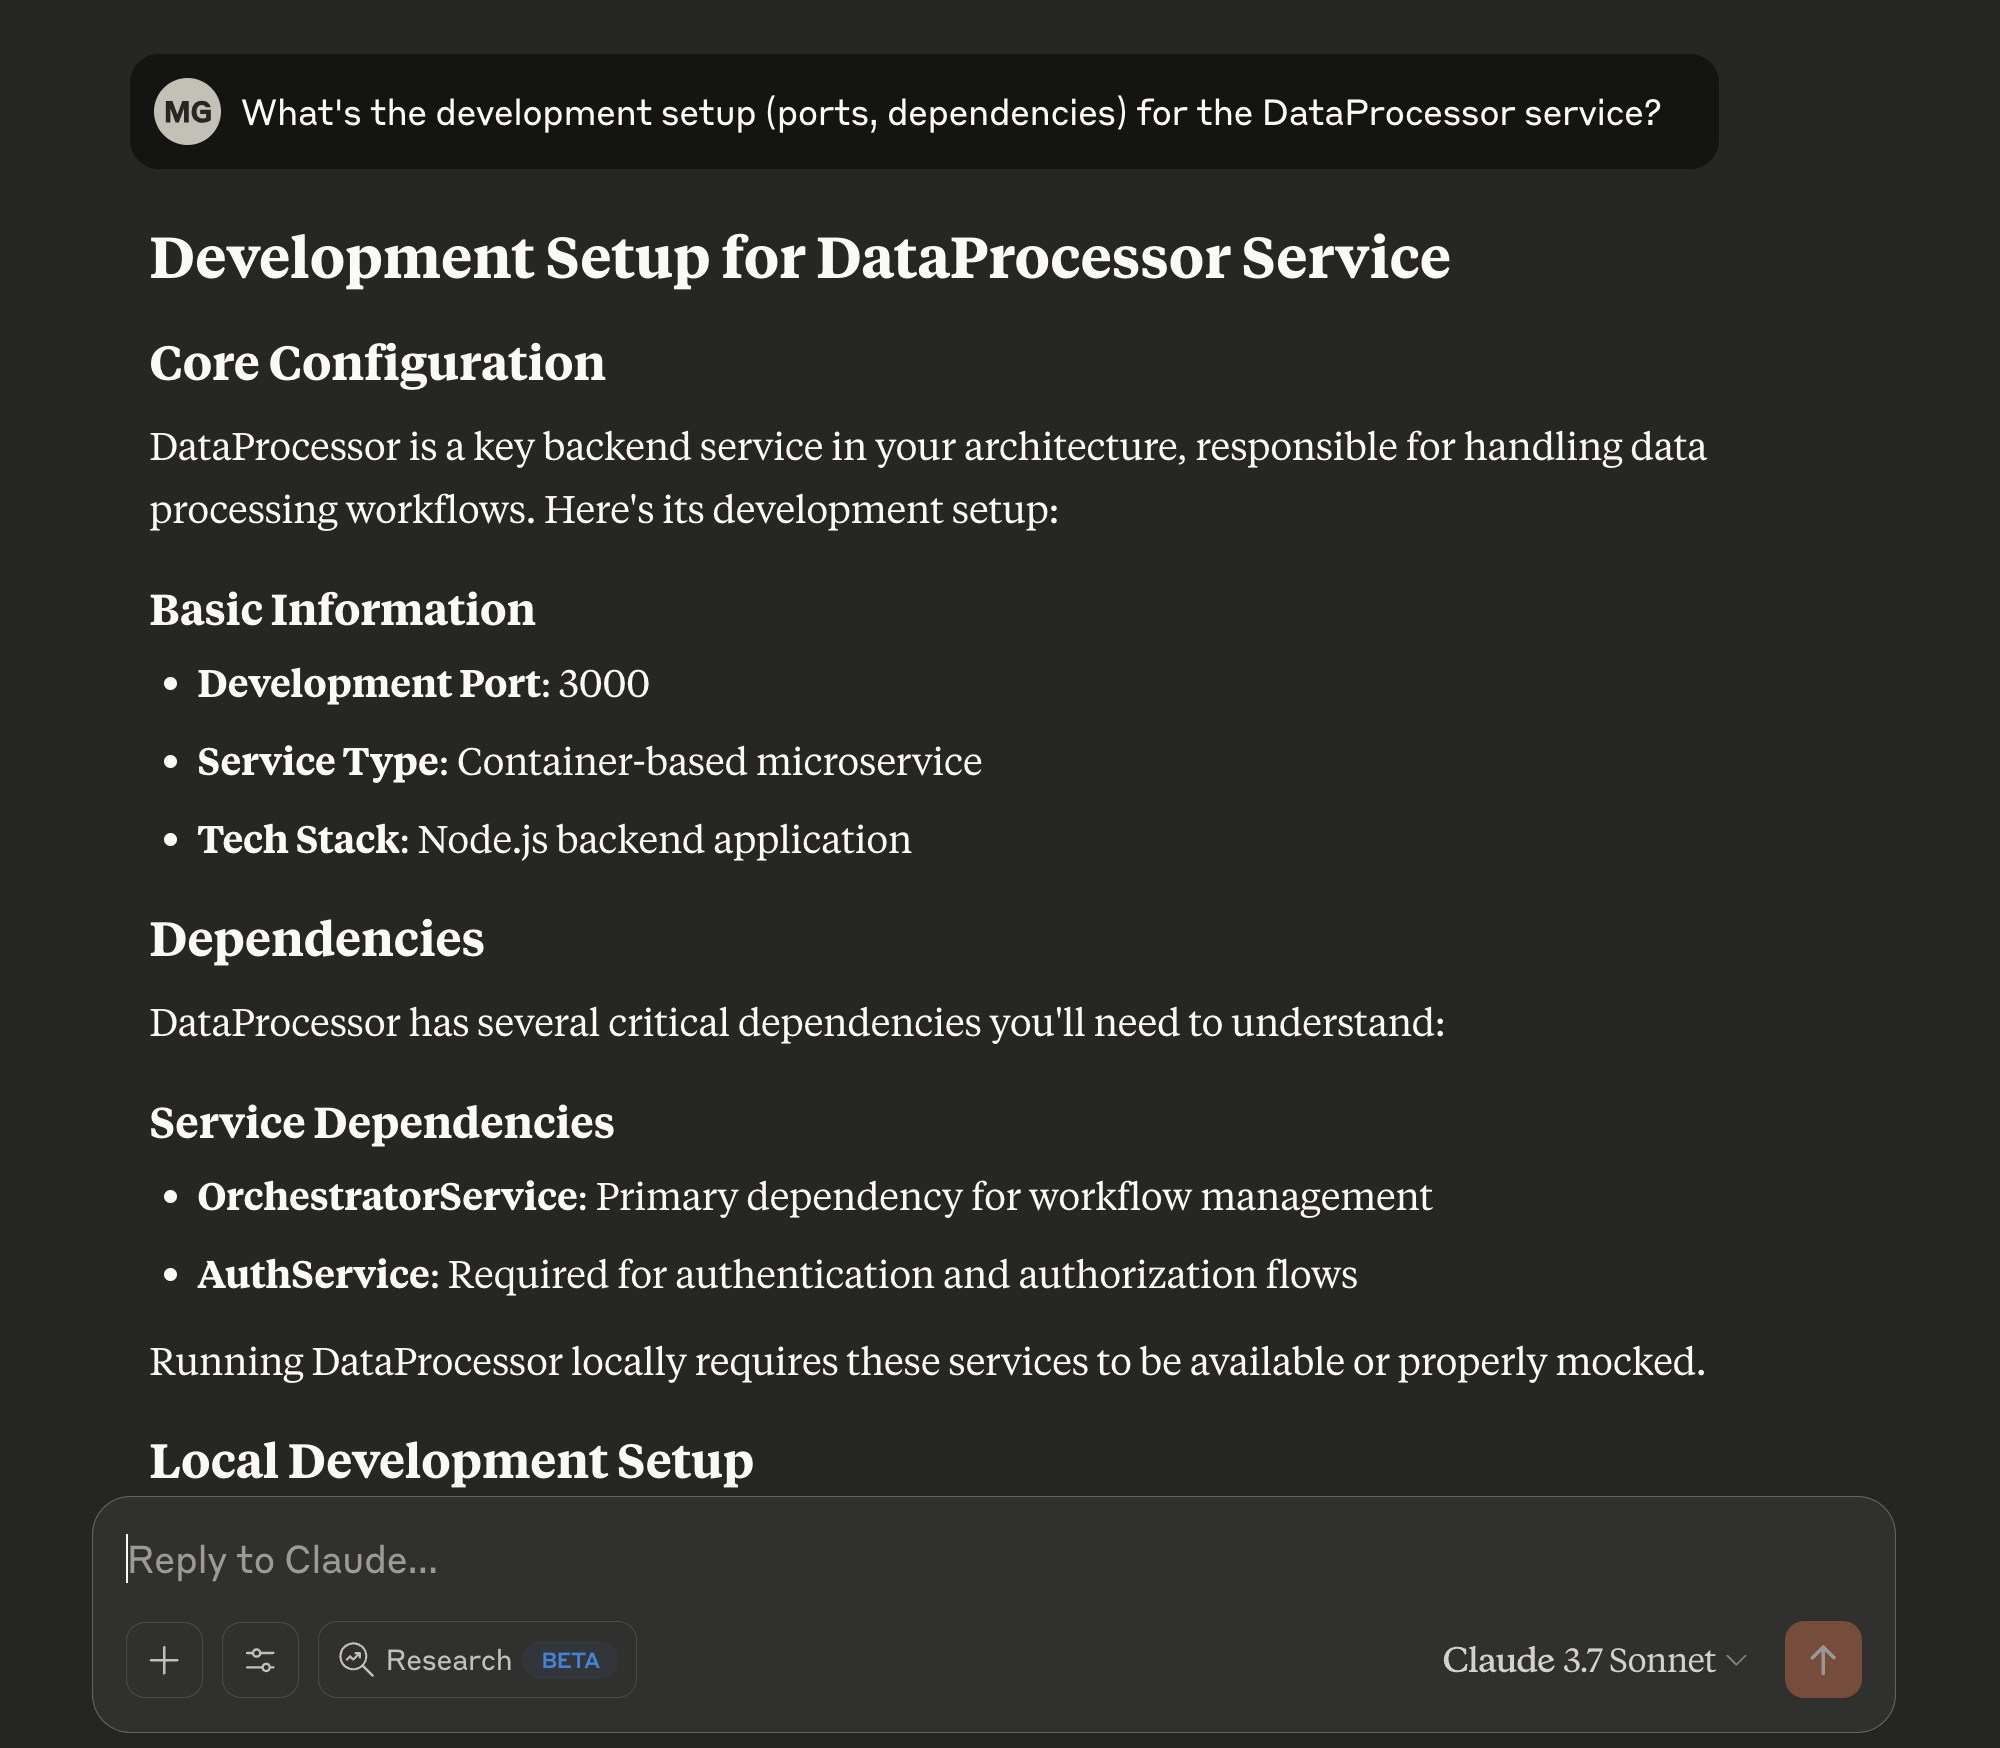
Streamline development and operations
Receive assistance with common development and operational tasks, directly within your workflow.
- Ask: "What do I need to do to set up a new 'ReportingService'?"
- Ask: "Guide me through creating a new component blueprint with 'name', 'description', and 'owner' properties."
- Ask: "Help me add a rule to the 'Tier1Services' scorecard that requires an on-call schedule to be defined."
Find your own use cases
You can use Port's MCP to find the use cases that will be valuable to you. Try using this prompt: "think of creative prompts I can use to showcase the power of Port's MCP, based on the data available in Port"
Installing Port MCP
Installing Port's MCP is simple. Follow the instructions for your preferred tool, or learn about the archived local MCP server.
- Cursor
- VSCode
- Claude
- Local MCP
To connect Cursor to Port's remote MCP, follow these steps:
- Go to Cursor settings, click on Tools & Integrations, and add a new MCP server
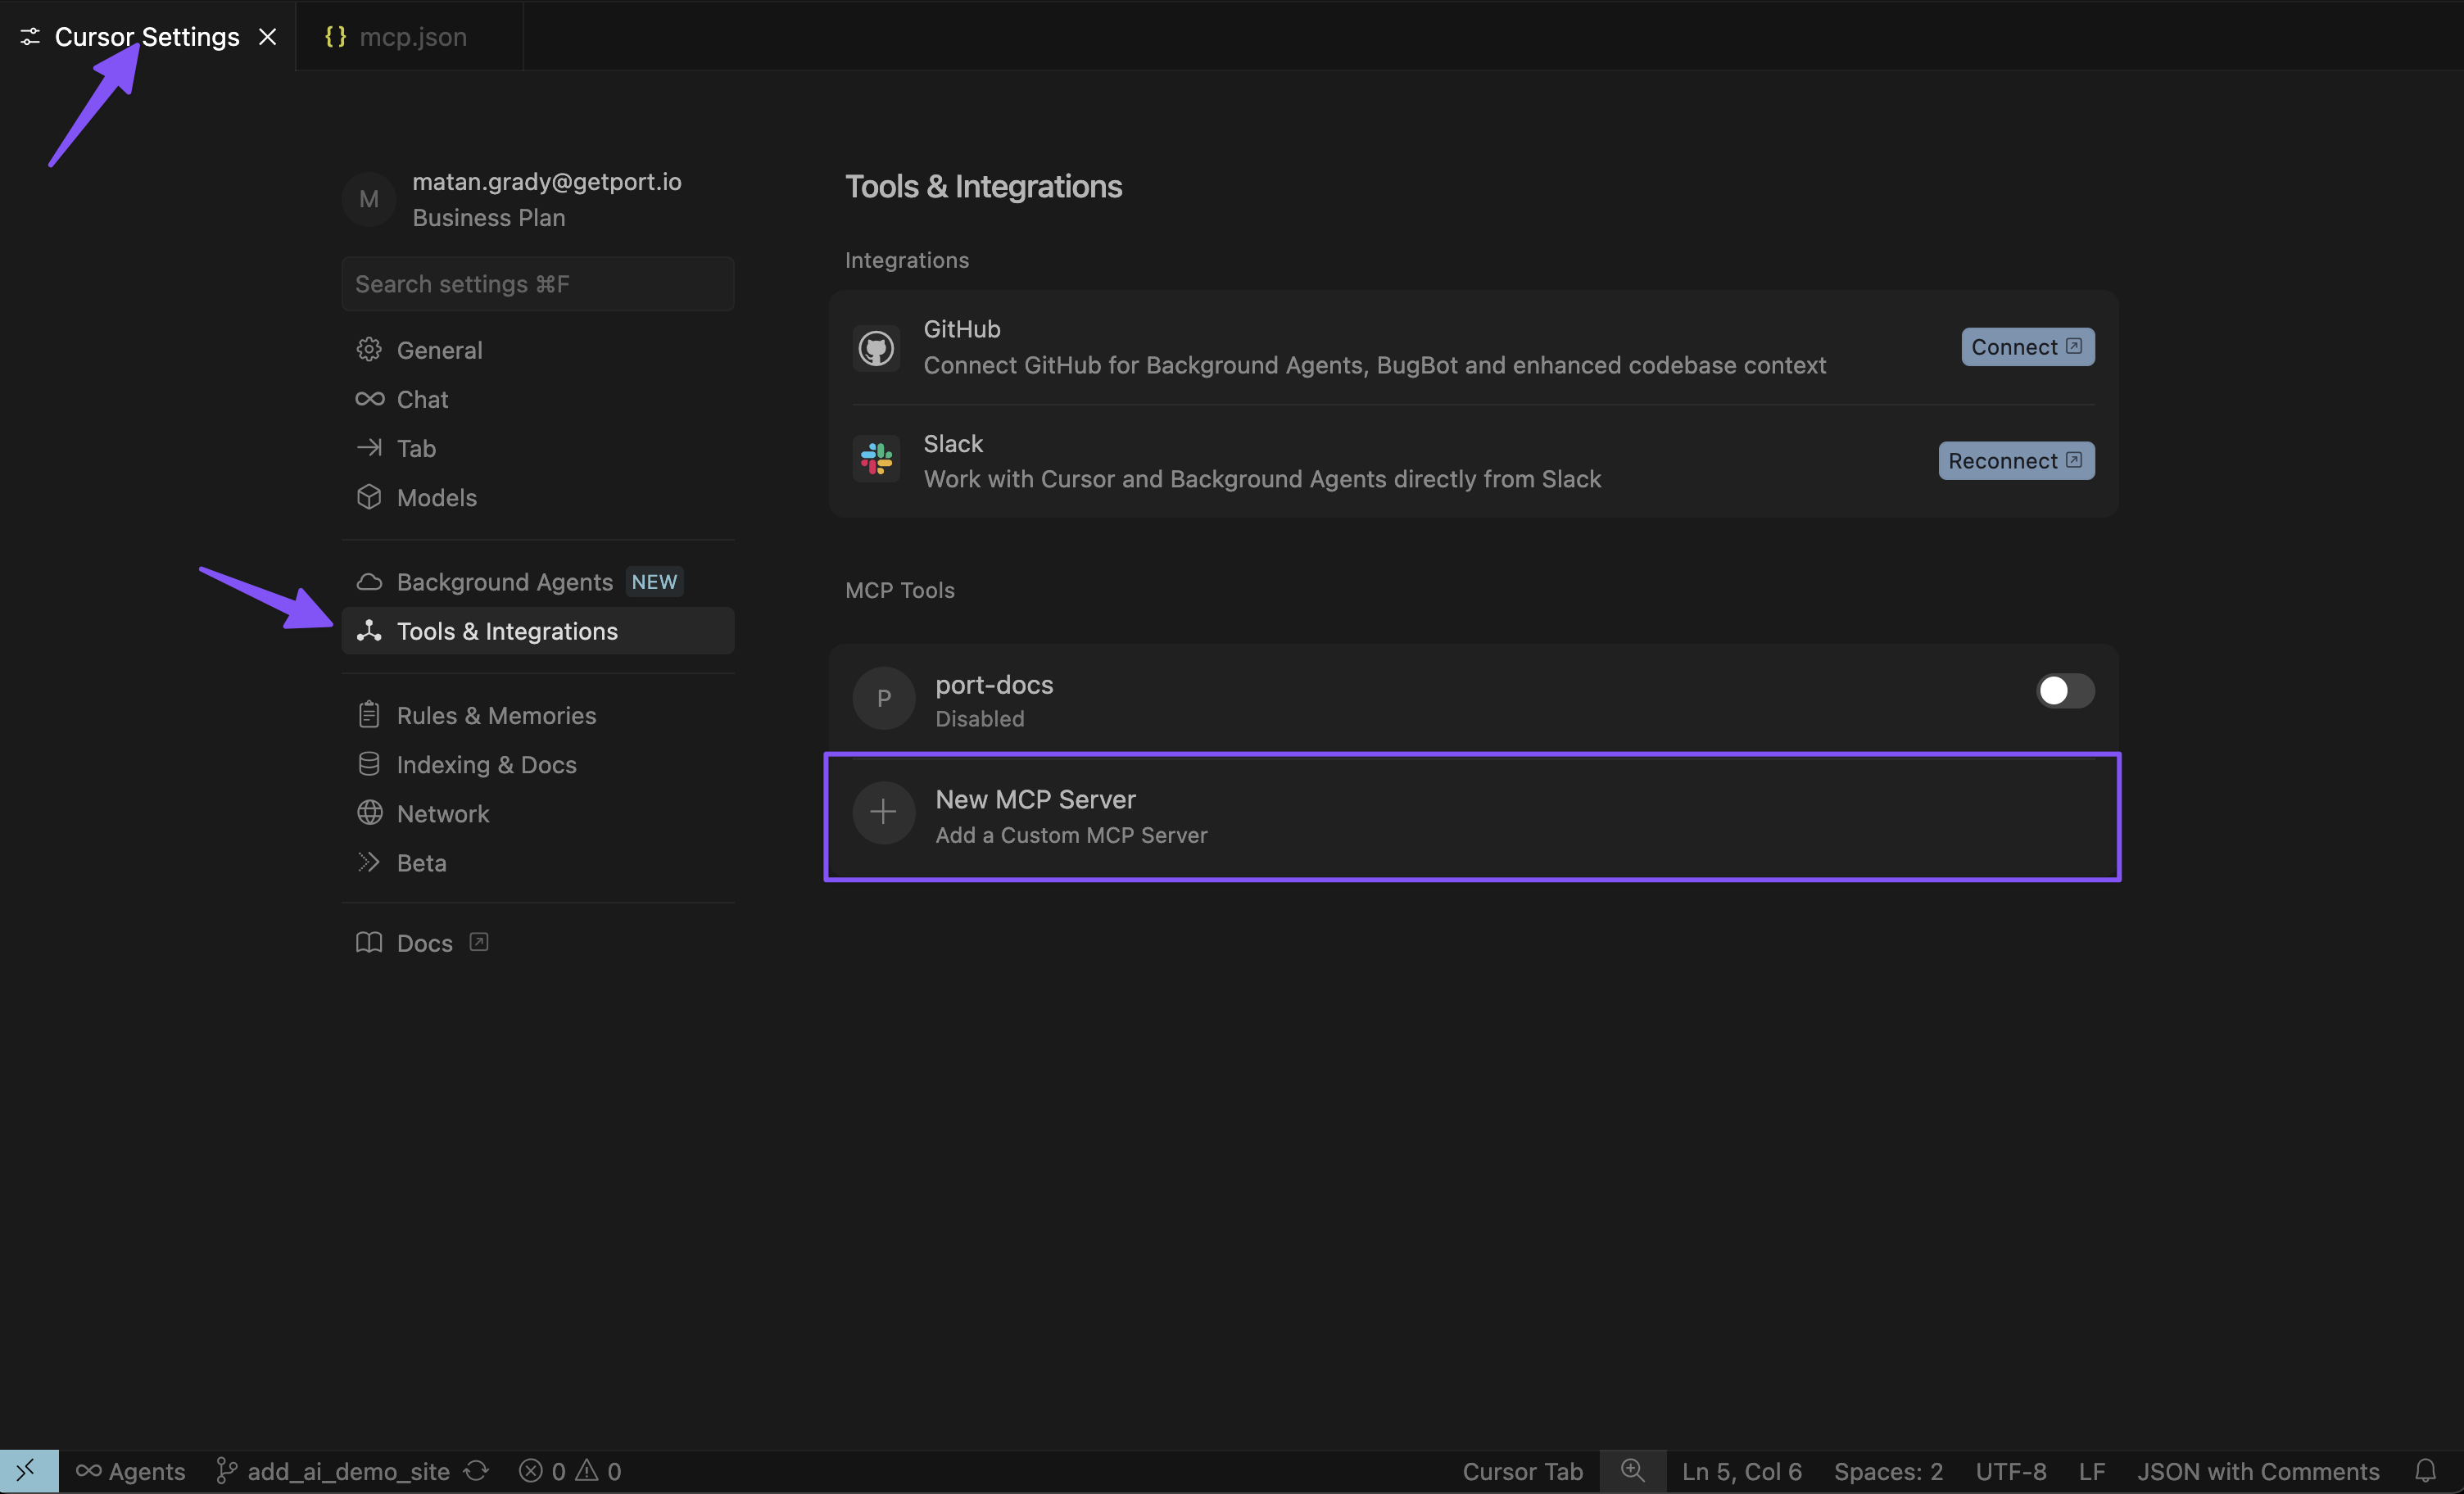
- Add the above configuration
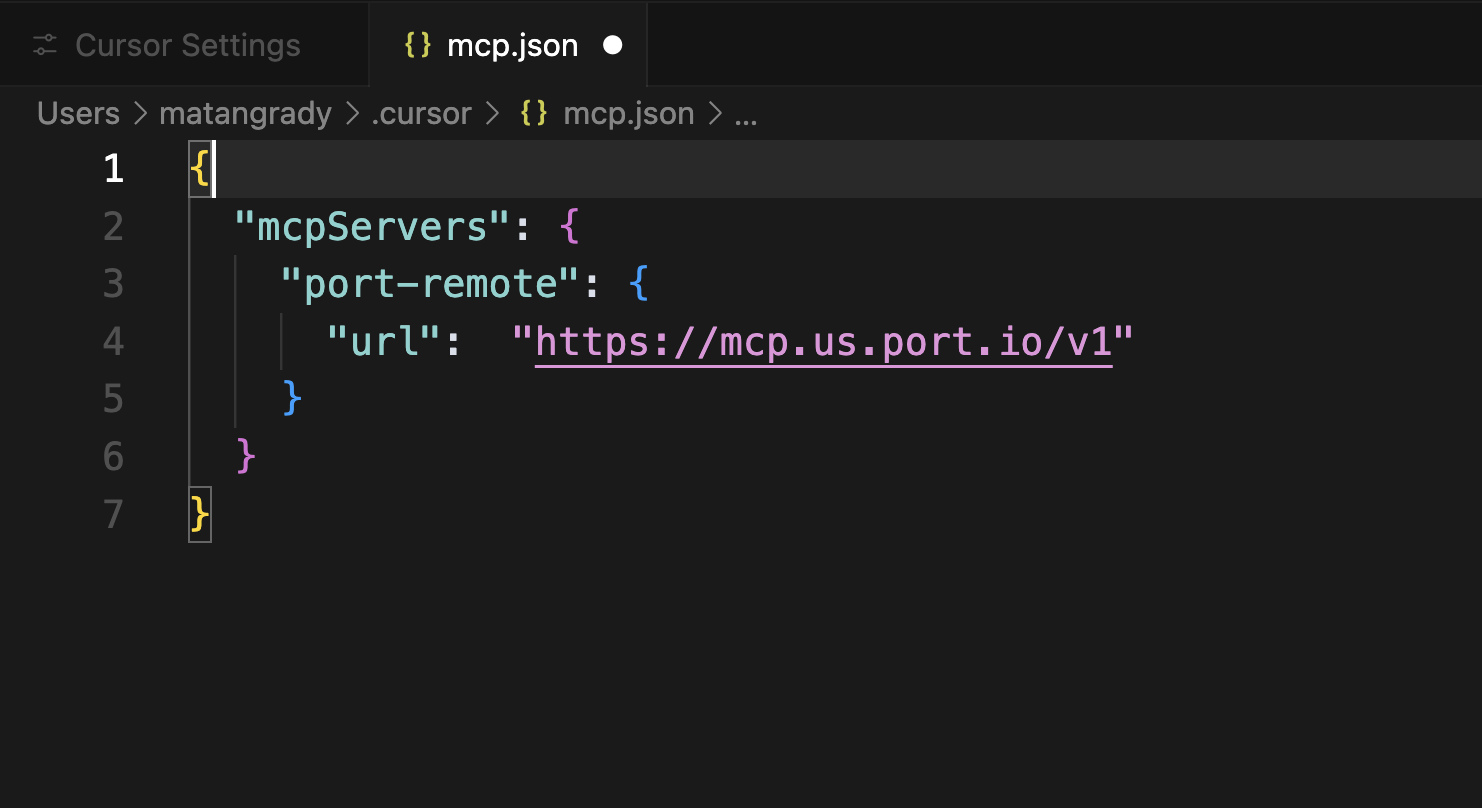
Use the appropriate configuration for your region:
- EU
- US
{
  "mcpServers": {
    "port-eu": {
      "url": "https://mcp.port.io/v1"
    }
  }
}
{
  "mcpServers": {
    "port-us": {
      "url": "https://mcp.us.port.io/v1"
    }
  }
}
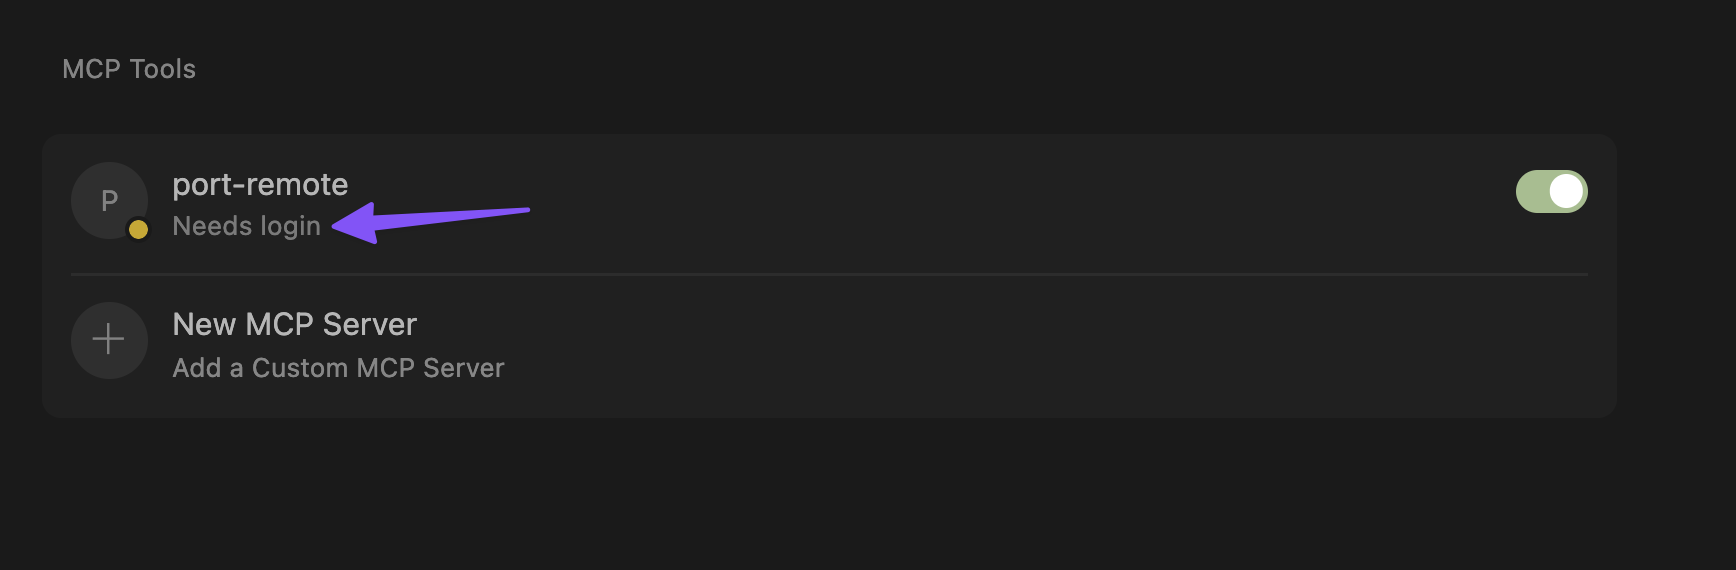
-
Login to Port Click on "Needs login", and complete the authentication flow in the window that opens up.
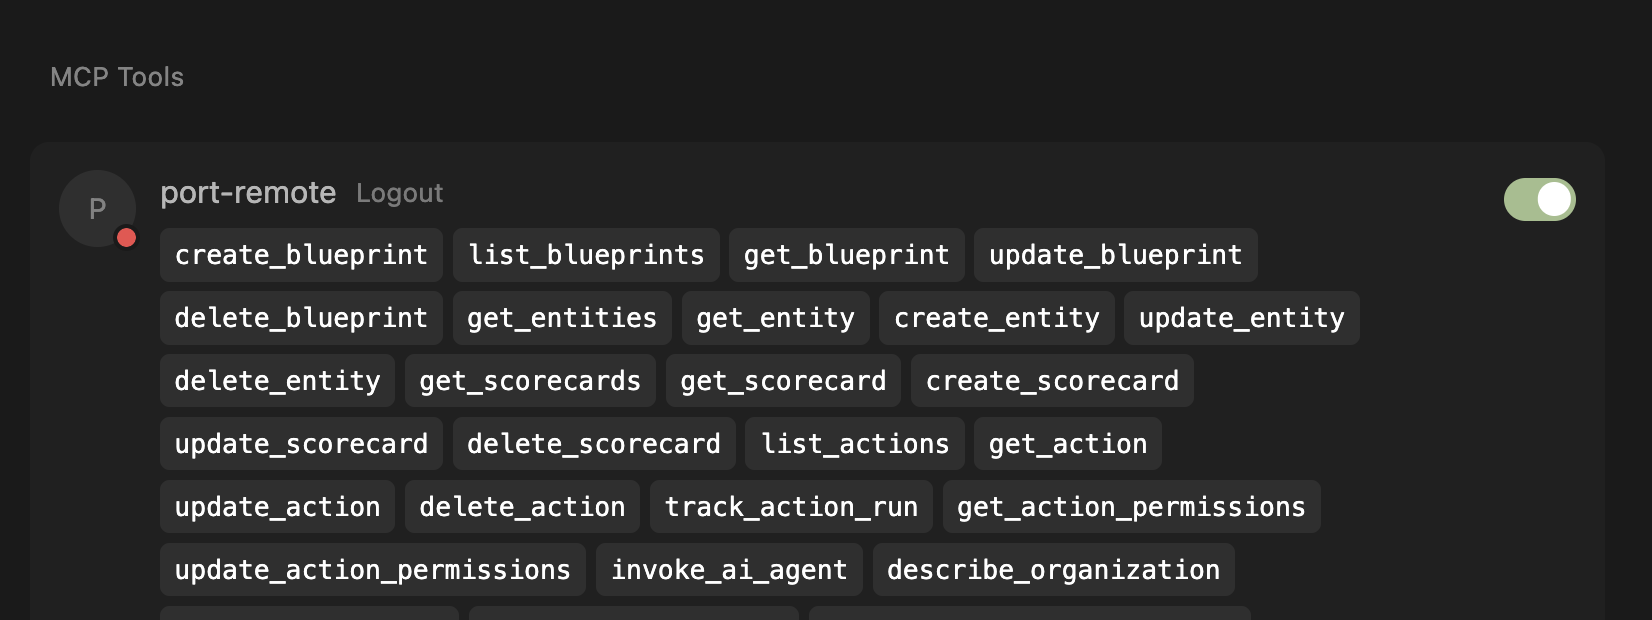
-
See the MCP tools After successfully connecting to Port, you'll see the list of available tools from the MCP.
In some cases, after clicking "Accept" in the authentication popup, the window won't get closed but the connection is established successfully. You can safely close the window.
If you still don't see the tool, try it a couple of times. We are aware of this behavior and working to improve it.
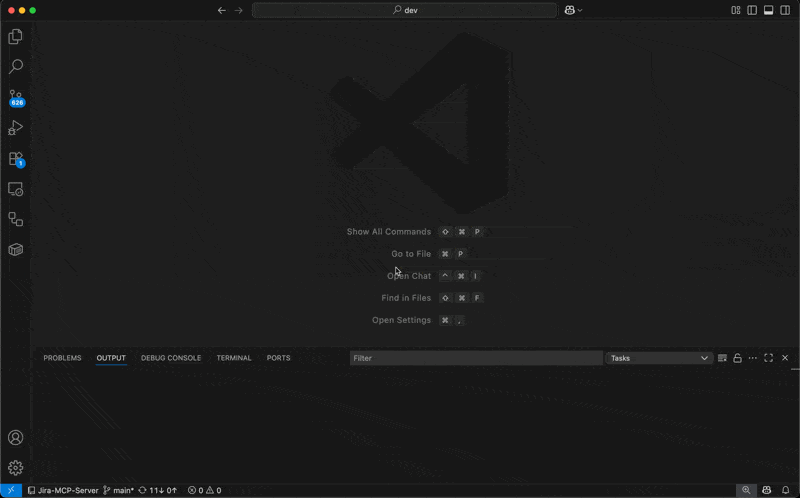
To connect VSCode to Port's remote MCP server, follow these detailed steps. For complete instructions, refer to the official VS Code MCP documentation.
Before proceeding, ensure your VS Code is updated to the latest version and that MCP is enabled for your GitHub organization. You may need to enable "Editor preview features" under Settings > Code, planning, and automation > Copilot via admin access from your organization.
This configuration uses the open-source mcp-remote package, which requires Node.js to be installed on your system. Before using the configuration, ensure Node.js is available by running:
npx -y mcp-remote --help
If you encounter errors:
- Missing Node.js: Install Node.js from nodejs.org
- Network issues: Check your internet connection and proxy settings
- Permission issues: You may need to run with appropriate permissions
Step 1: Configure MCP Server Settings
- Open VS Code settings
- Search for "MCP: Open user configuration" (or follow the instructions on a workspace installation)
- Add the server configuration using the appropriate configuration for your region:
- EU
- US
{
  "mcpServers": {
    "port-vscode-eu": {
      "command": "npx",
      "args": [
        "-y",
        "mcp-remote",
        "https://mcp.port.io/v1"
      ]
    }
  }
}
{
  "mcpServers": {
    "port-vscode-us": {
      "command": "npx",
      "args": [
        "-y",
        "mcp-remote",
        "https://mcp.us.port.io/v1"
      ]
    }
  }
}
Step 2: Start the MCP Server
- After adding the configuration, click on "Start" to initialize the MCP server
- If you don't see the "Start" button, ensure:
- Your VS Code version is updated to the latest version
- MCP is enabled for your GitHub organization
- "Editor preview features" is enabled under Settings > Code, planning, and automation > Copilot
Step 3: Verify Connection
- Once started, you should see the number of available tools displayed
- If you don't see the tools count:
- Click on "More" to expand additional options
- Select "Show output" to view detailed logs
- Check the output panel for any error messages or connection issues
Step 4: Access Port Tools
- Start a new chat session in VS Code
- Click on the tools icon in the chat interface
- You should now see Port tools available for use
To connect Claude to Port's remote MCP, you need to create a custom connector. This process does not require a client ID. For detailed instructions, refer to the official Anthropic documentation on custom connectors.
When prompted for the remote MCP server URL, use the appropriate URL for your region:
- EU
- US
https://mcp.port.io/v1
https://mcp.us.port.io/v1
The local MCP server is an open-source project that you can run on your own infrastructure. It offers a similar set of capabilities, but requires manual setup and maintenance.
While you can use it, we are no longer supporting it and are not tracking the project issues and activities.
Prerequisites
- A Port.io account with appropriate permissions.
- Your Port credentials (Client ID and Client Secret). You can create these from your Port.io dashboard under Settings > Credentials.
Installation
The Port MCP Server can be installed using Docker or uvx (a package manager for Python). While the setup is straightforward, the specifics can vary based on your chosen MCP client (Claude, Cursor, VS Code, etc.).
For comprehensive, step-by-step installation instructions for various platforms and methods (Docker, UVX), please refer to the Port MCP Server GitHub README. The README provides the latest configuration details and examples for different setups.
Token-based authentication
You can also connect using token-based authentication for automated environments like CI/CD pipelines where interactive authentication isn't possible:
curl -X POST "https://api.getport.io/v1/auth/access_token" \
  -H "Content-Type: application/json" \
  -d '{"clientId":"YOUR_CLIENT_ID","clientSecret":"YOUR_CLIENT_SECRET"}'
For complete examples and detailed setup instructions, see our token-based authentication guide.
Connecting to AI Agents
To connect the Port MCP server to AI agents in CI/CD environments or other automated contexts where interactive authentication isn't possible, see our token-based authentication.